[UE] 마우스로 가리킨 액터에 외곽선 효과주기

적 플레이어나 몬스터에 외곽선 효과를 줄 때가 있다. 이 때 Project Settings에서 Postprocessing 설정값을 바꿔줘야 할 때가 있다. 간단한 설정이지만 까먹고 넘어가는 경우가 많으니 주의하자.
목차
마우스로 가리킨 액터에 외곽선 효과주기
적 플레이어나 몬스터에 외곽선 효과를 줄 때가 있다. 이 때 Project Settings에서 Postprocessing 설정값을 바꿔줘야 할 때가 있다. 간단한 설정이지만 까먹고 넘어가는 경우가 많으니 주의하자.
Project Settings

Project Settings
- Postprocessing
- Custom Depth-Stencil Pass: Enabled with Stencil 로 변경. (기본값은 Enabled)
Level에 Post Process Volume 배치
레벨맵에 Post Process Volume을 배치한다.
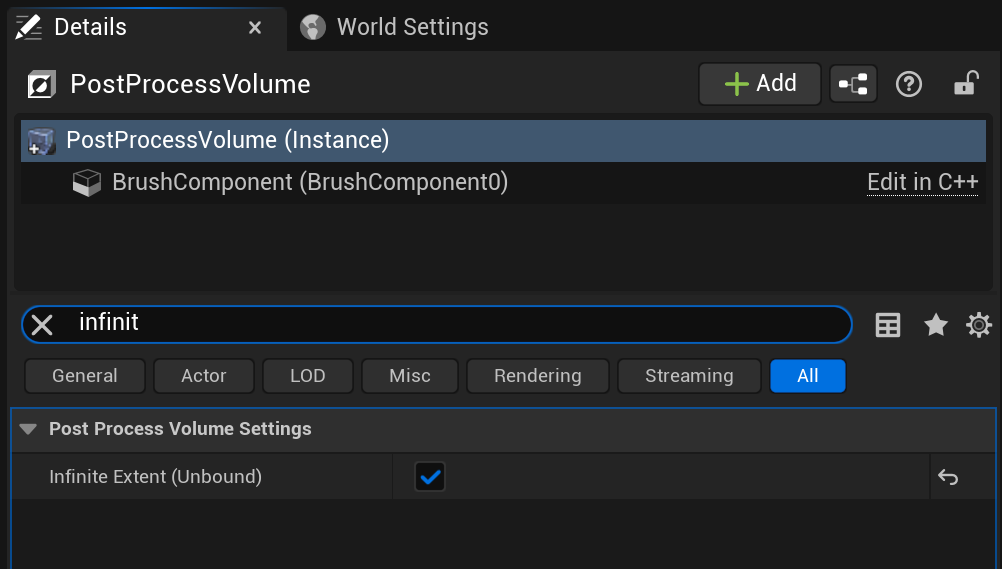
Post Process Volume 사이즈를 키우기 귀찮으면 아래와 같이 infinite Extent를 체크하여 레벨맵 전체에 적용시킨다.
- Post Process Volume Settings
- Infinite Extent(Unbound)를 체크

Post Process Volume에 material 설정
Post Process Materials
- Array에 +버튼을 누르고 Asset reference로 항목을 추가한 뒤
- 외곽선 효과로 사용할 Material를 적용한다.


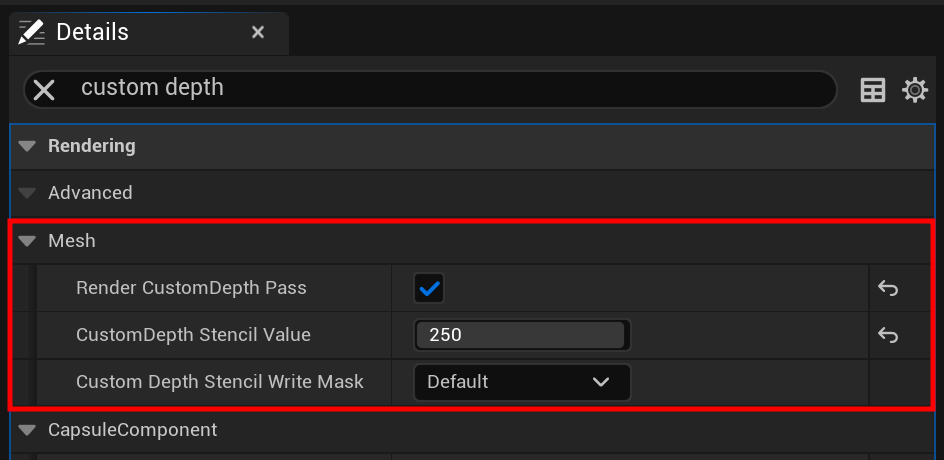
Enemy 액터에 CustomDepthPass 및 Stencil Value 적용
#include "Character/EnemyCharacter.h"
AEnemyCharacter::AEnemyCharacter()
{
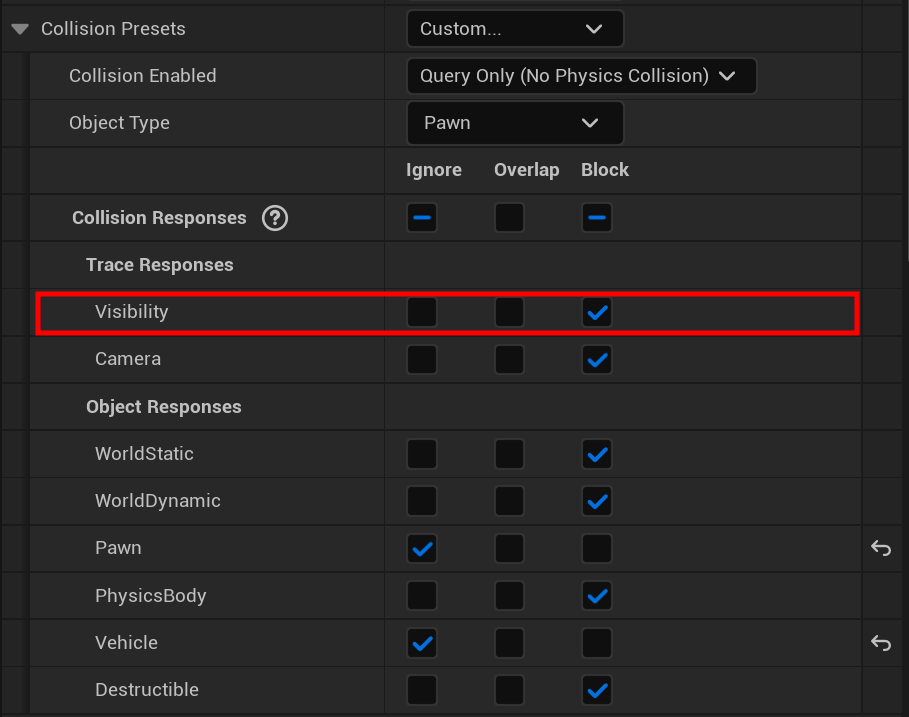
GetMesh()->SetCollisionResponseToChannel(ECC_Visibility, ECR_Block);
}
void AEnemyCharacter::HighlightActor()
{
GetMesh()->SetRenderCustomDepth(true);
GetMesh()->SetCustomDepthStencilValue(CUSTOM_DEPTH_RED);
Weapon->SetRenderCustomDepth(true);
Weapon->SetCustomDepthStencilValue(CUSTOM_DEPTH_RED);
}
void AEnemyCharacter::UnHighlightActor()
{
GetMesh()->SetRenderCustomDepth(false);
Weapon->SetRenderCustomDepth(false);
}
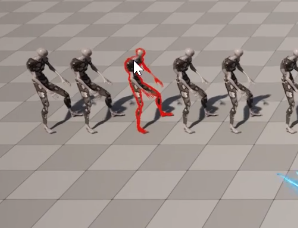
실행화면
'⭐ Unreal Engine > UE Debugging Log' 카테고리의 다른 글
| [UE] GAS 사용 시 서버에서만 호출되고 클라이언트에서 리플리케이션되지 않는 문제 해결하기. OnRep_ActivateAbilities() 사용으로 해결 (0) | 2024.04.11 |
|---|---|
| [UE Net] Dedicated Server 시작하기 (0) | 2024.03.13 |
| [UE] Visual Stduio 호환되지 않음, 로드 실패 (0) | 2023.11.13 |
| [UE5] 언리얼 엔진5.3 빌드하기 (UE build from source code) (0) | 2023.11.09 |
| [UE] Player 뒤쪽에 있는 적에게 Trace Hit 처리되어 총알이 뒤로 날아가는 (+Crosshair 빨간색으로 활성화) 문제 해결 (1) | 2023.10.03 |